I’m a huge fan of iBeacons (and if you’re coming to MS Ignite NZ 2016 then you can hear me talk about them) and they are pretty easy to get started with on iOS. The most basic use case is beacon monitoring - when your app detects a signal from an iBeacon it can wake up and do some processing in the background.
Some of the time this processing might just be showing the user a notification - in a retail example if an app user has looked at a product in your app and they walk into one of your stores you could notify them that the product they looked at was in stock (and direct them right to it using the indoor location capabilities available with iBeacons). This is pretty simple to do - create a location manager, authorize it, monitor for a beacon, detect the event and show a notification. The code below shows the sort of thing you would need to do.
var region = new CLBeaconRegion(proximityId, "My Region");
region.NotifyOnEntry = true;

var locationManager = new CLLocationManager();

locationManager.AuthorizationChanged += (s, e) =>
    {
       if (e.Status == CLAuthorizationStatus.AuthorizedAlways)
          locationManager.StartMonitoring(region);
    };

locationManager.RegionEntered += (s, e) => SendNotification();

locationManager.RequestAlwaysAuthorization();
The SendNotification method would then create an iOS local notification and display it.
This is cool, and pretty simple. But thanks to iOS 10 it’s now even easier. As part of iOS 10, Apple introduced a new notifications API, and part of this is a new set of notification triggers. These triggers are classes that trigger a notification - you create a notification request with some content and a trigger that determines when the notification will fire. The simplest example is a trigger that fires after a certain duration (called UNTimeIntervalNotificationTrigger), this will show a notification after a set time interval - and this is similar to the existing capabilities before iOS 10. The trigger we’re interested in though is a new capability - UNLocationNotificationTrigger. This is a trigger that fires when the device enters or leaves a region - be it a geographic region or an iBeacon region.
We can use this new trigger to show a local notification when our app enters or leaves an iBeacon region. First we create the region in exactly the same way as for monitoring - using a proximity UUID and optionally a major and minor to define the region and setting the notify on entry or exit properties as applicable:
var region = new CLBeaconRegion(new NSUuid(ProximityUUID), "MyRegion");
region.NotifyOnEntry = true;
region.NotifyOnExit = false;
Then we ensure the correct permissions are set for notifications and locations:
UNUserNotificationCenter.Current.RequestAuthorization(UNAuthorizationOptions.Alert, (a, e) => { });
var locationManager = new CLLocationManager();
locationManager.RequestWhenInUseAuthorization();
Remembering of course to set the appropriate permission message for location monitoring in the info.plist:
<key>NSLocationWhenInUseUsageDescription</key>
<string>Detect beacons</string>
Next we create the notification:
// Create the content
var content = new UNMutableNotificationContent();
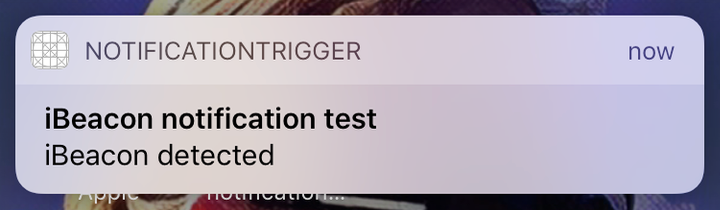
content.Title = "iBeacon notification test";
content.Body = "iBeacon detected";
// Create the location trigger
var trigger = UNLocationNotificationTrigger.CreateTrigger(region, true);
// Create the request
var requestID = Guid.NewGuid().ToString("N");
var request = UNNotificationRequest.FromIdentifier(requestID, content, trigger); UNUserNotificationCenter.Current.RemoveAllPendingNotificationRequests();
UNUserNotificationCenter.Current.AddNotificationRequest(request, e => { });
The notification code is fairly standard iOS 10 boilerplate notification code - we create content for the notification, create a trigger for it, create a notification request based off the content and trigger then add the request to the notification center.
The interesting bit is the trigger - we create a trigger using a static method passing it the region:
UNLocationNotificationTrigger.CreateTrigger(region, true);
The first parameter is our region - in our example this is an iBeacon region but it could also be a location region. The second parameter determines if the notification should be re-scheduled after it has been triggered - set this to true if you want the notification to pop up every time, or false if you don’t want it to repeat.
Once this notification has been registered we can exit our app, and it will wake up as soon as the iBeacon region is entered and show the notification.
Why do it this way?
This may seem like a pointless thing to do - at first glance this doesn’t give us anything more than what we can get by showing the notification using the location managers RegionEntered event. There is one important difference here though.
When using the location manager directly we have to authorize the app always - the user has to agree to have our app monitor their location even when the app is not in use, something that some users don’t like. By using the location based notification triggers we only need to request when in use authorization, not always (you can see this in the code above). Despite only having when in use authorization you app can still detect entering the region even when the app is in the background or even terminated.
Why not to do it this way?
Your app isn’t actually run when the region is entered, all that happens is the local notification is shown. This is fine if that’s all you need (and the new iOS 10 notifications API can allow you to do some pretty neat stuff in a notification), but if you need your app to run then you have to monitor using the location manager and use always authorization.
You can find the example code for this on GitHub.