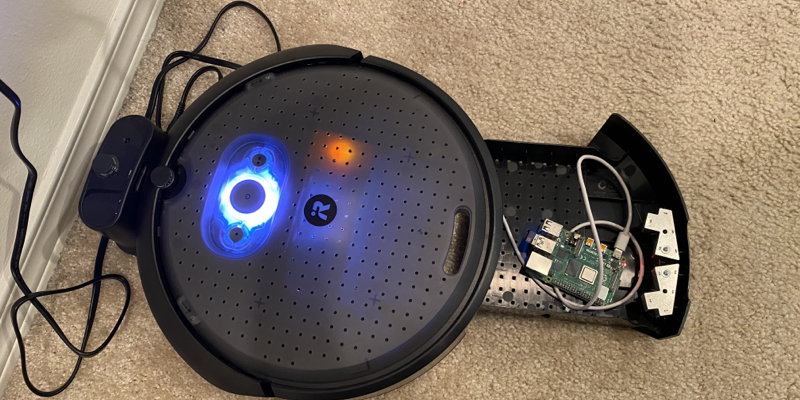
In my last post I showed how I connected a Raspberry Pi to an iRobot Crete3 robot. In this post I show how to subscribe to messages sent by the robot to the Pi using rclpy, the ROS Python library.
One downside to ROS is that the documentation needs some love. It covers in great detail how to do things, but not the why, so anything I write in this post is based off my understanding from my couple of days working with ROS, and could be completely wrong! If so, please correct me in the comments.
ROS2 applications
ROS applications are based around a graph of nodes that can publish and subscribe to messages on different topics. Each node can be a separate process, can run on a separate machine connected to the network, or you can have multiple nodes running in the same process.
The robot is a node that published messages on various topics, and can listen to messages on other topics. If you read the last post, you will know that the robot has a range of topics that you can see by running ros2 topic list:
/battery_state
/cmd_audio
/cmd_lightring
/cmd_vel
/dock
/hazard_detection
/imu
/interface_buttons
/ir_intensity
/ir_opcode
/kidnap_status
/mobility_monitor/transition_event
/mouse
/odom
/parameter_events
/robot_state/transition_event
/rosout
/slip_status
/static_transform/transition_event
/stop_status
/tf
/tf_static
/wheel_status
/wheel_ticks
/wheel_vels
The majority of these topics contain sensor data published by the robot with the exception of the 3 cmd topics - cmd_audio, cmd_lightring and cmd_vel. You can publish data to these topics to play audio, configure the light ring, or move the robot.
Topics are designed to have continuous streams of data. For example if you subscribe to the /battery_state topic, you will get a continuous stream of battery data updated every few seconds.
Robots can also have services and actions. These are abstractions that make it easier to program a robot. Services are designed for quick calls to do calculations or get states, maybe to query a sensor or take advantage of onboard processing such as a built-in image processor. Actions are commands you can send to a robot to do something, for example with the Create3 there are actions to dock and undock, so drive the robot to the docking station and connect it to recharge, or drive off the docking station.
You can test the actions using the following run from your Raspberry Pi.
Run this command to undock the robot:
ros2 action send_goal /undock irobot_create_msgs/action/Undock "{}"
Then run this command to re-dock the robot:
ros2 action send_goal /dock irobot_create_msgs/action/DockServo "{}"
All the topics, services and actions are documented in the iRobot ROS2 API docs.
Subscribing to messages using rclpy
rclpy is the ROS Python library and has all the functionality you need to interact with a robot. But there is a catch - you can’t just create a Python script and use rclpy, you have to build a ROS2 application inside a ROS2 workspace.
ROS2 workspaces
ROS applications are compiled inside a workspace - a folder with a predefined structure containing your code. You write your code, compile a ROS application using a tool called colcon, configure your environment by sourcing a file created by the build, then run your code using ROS.
There is a core ROS workspace provided by the install, known as an underlay, and you can have multiple versions installed. You then stack additional workspaces on top with your own code, called overlays. No, I still don’t understand this and I can’t find good documentation to explain why.
To use Python to developer ROS applications, you need to create a Python package inside your workspace, and this package contains the code for your executable. This is similar to creating a pip package, with setup.py and setup.cfg files, but with the addition of a package.xml file to help colcon build the package.
You can find an example as a template repo on my GitHub at github.com/jimbobbennett/irobot_create3_ros_workspace. You can use this as a template to create your own workspace.
Structure of the workspace
You can see the structure detailed blow by creating a new repo using the github.com/jimbobbennett/irobot_create3_ros_workspace template repo.
The workspace consists of a src folder where the source code for your application lives. This src folder contains the Python package as a folder. This package folder contains setup.py and setup.cfg files. These files define any extra pip packages needed by your code, the location of the package.xml file needed by colcon, and the entry point for the ROS application.
The package.xml file details the ROS package, including dependencies on other packages. These include the ROS packages that define message formats. For example:
<depend>rclpy</depend>
<depend>geometry_msgs</depend>
<depend>sensor_msgs</depend>
<depend>irobot_create_msgs</depend>
This dependency list shows a dependency on the rclpy ROS python package, as well as the packages for the generic geometry messages used to control a robot (geometry_msgs), generic sensor messages used to gather standard sensor data such as battery state (sensor_msgs), and the specific messages for the iRobot Create3 (irobot_create_msgs).
Inside the package folder is a folder containing your code, along with a resource folder with a single file with the same name as the folder containing your code. No idea why, but it seems to be needed…
The code folder is a Python package, and needs an __init__.py file, though this can be empty. Inside the code folder is another folder with your actual package code, again containing an __init__.py file that can be empty, and a code file that contains your main method, along with any other code files you need. Your setup.py needs to point to this main method as its entry point.
Subscribing to messages
If you look at the template repo, particularly the control_robot.py file you will see an example main method.
This method starts by initializing the ROS application with rclpy.init(args=args), passing any args sent to the application. It then creates a subscriber, in this case a subscriber to the battery state to get the percentage charge in the robots battery.
Subscribers are ROS nodes - ROS applications are graphs of nodes that publish and subscribe messages, and your application can contain one oe more nodes, and nodes can publish and subscribe to as many topics as needed. In the template repo, the node in question is a battery state subscriber, implemented in the BatteryStateSubscriber class:
class BatteryStateSubscriber(Node):
All nodes need to derive from the rclpy.node.Node base class, and this has functionality to manage subscriptions, logging, execution and more.
In the __init__ method, the node creates a subscription to the battery state:
self.subscription_battery_state = self.create_subscription(
    BatteryState,
    '/battery_state',
    self.get_battery_state,
    qos_profile)
The create_subscription method on the base Node class takes a number of options:
BatteryState- This is the message type. Messages can be raw strings, or typed. Thesensor_msgs,sensor_msgsandirobot_create_msgspackages described earlier contain the types for these messages. In this case, we want battery information, so the type issensor_msgs.msg.BatteryState, a ROS defined message for battery states.'/battery_state'- This is the topic name used by the robot to publish the battery stateself.get_battery_state- This is the callback method called whenever a message is received by the subscriptionqos_profile- This is the quality of service profile defined by the subscriber. This is covered below.
Once this subscription is created, every time a message is published on this topic, the callback method is called. The callback method has this signature:
def get_battery_state(self, msg: BatteryState):
The msg passed is an instance of sensor_msgs.msg.BatteryState, so the properties on this message can be queried to get the state of the battery. For example:
self.get_logger().info(
    'Battery percentage:{:.0%}'.format(msg.percentage))
uses the logger on the node to log out the current percentage charge on the battery.
[INFO] [1663974929.958794823] [battery_state_subscriber]: Subscribing to battery state
[INFO] [1663974930.072528455] [battery_state_subscriber]: Subscribed!
[INFO] [1663974931.658984386] [battery_state_subscriber]: Battery percentage:98%
Quality of service
ROS ia based around sending messages to topics, and can be considered to be a message broker. Like all message brokers, there is a quality of service (QoS) that defines when a topic can be considered stale, how messages are stored if a subscriber is offline, things like that. You can read more in the ROS quality of service documentation, but the important point is that the subscriber must subscribe with the same quality of service settings as the publisher or no messages will be received.
You can find the QoS settings from a topic using this command:
ros2 topic info -v <topic>
Where <topic> is the name of the topic to query. In the case of the /battery_state topic, the results of this call are:
Type: sensor_msgs/msg/BatteryState

Publisher count: 1

Node name: robot_state
Node namespace: /
Topic type: sensor_msgs/msg/BatteryState
Endpoint type: PUBLISHER
GID: 01.0f.34.90.5c.09.ad.d2.01.00.00.00.00.01.4f.03.00.00.00.00.00.00.00.00
QoS profile:
    Reliability: BEST_EFFORT
    Durability: VOLATILE
    Lifespan: 9223372036854775807 nanoseconds
    Deadline: 9223372036854775807 nanoseconds
    Liveliness: AUTOMATIC
    Liveliness lease duration: 9223372036854775807 nanoseconds

Subscription count: 0
The relevant details are the QoS profile, particularly the Reliability, Durability, and the Liveliness. To subscribe to these messages, the subscriber needs to create a QoSProfile object with the same settings, and pass this to the create_subscription call:
from rclpy.qos import QoSProfile, ReliabilityPolicy, LivelinessPolicy, DurabilityPolicy

qos_profile = QoSProfile(
            reliability=ReliabilityPolicy.BEST_EFFORT,
            liveliness=LivelinessPolicy.AUTOMATIC,
            durability=DurabilityPolicy.VOLATILE,
            depth=1
        )

self.subscription_battery_state = self.create_subscription(
    BatteryState,
    '/battery_state',
    self.get_battery_state,
    qos_profile)
If you subscribe to a ROS topic and don’t receive any messages, check your QoS settings
Running the ROS application
Once you have your ROS workspace with your code, you can run it.
The first step is to build the workspace:
colcon build
This command builds the package and creates 3 directories:
build- This contains the compiled Python packageinstall- This contains the application that can be installed and run on another devicelog- This contains the build logs
To run the code, first you need to source an install script to set the environment:
source ./install/local_setup.sh
Finally run the ROS package:
ros2 run <package name> <application>
For example, if you use the template repo mentioned earlier in this post, you can run with:
ros2 run irobot_create3_example_py control_robot
This will run the control_robot module in the irobot_create3_example_py package, subscribing to the battery state and printing it to the console:
ubuntu@ubuntu:~/irobot_create3_ros_workspace$ ros2 run irobot_create3_example_py control_robot
[INFO] [1663974929.958794823] [battery_state_subscriber]: Subscribing to battery state
[INFO] [1663974930.072528455] [battery_state_subscriber]: Subscribed!