You’re at an MLH Hackathon and you decide you want to win the Domain.com prize for the best domain name registered at the event. You’ve decided on the ultimate name, and now you want to use it for your hack…
But what do you do next? How can you take your amazing code and have it appear across the internet using your new domain name? Well this post is here to help!
Deploy your code to the cloud
The first thing to do is deploy your code to the cloud, ready to have the domain name assigned. To do this, you will need to deploy it to an Azure App Service.
If you don’t already have an Azure account, sign up for a free account now!
- Students can sign up at aka.ms/FreeStudentAzure and get US$100 to use for 12 months, along with free tiers of a load of services for 12 months along with other services free for life, and after that 12 months is up, as long as you are still a student you can renew each year and get another US$100/12 months of free stuff. No credit card required.
- If you are not a student, you can sign up at aka.ms/FreeAz and get US$200 to use in the first 30 days, as well as 12 months of free services along with other services free for life.
Next deploy your code to Azure App Service. App Service is a fully managed platform to run your web apps, be they Flask, Node, PHP, ASP .NET, whatever. You supply the code and App Service will host it for you. There are loads of ways to deploy to App Service, so I won’t cover them all here. You can read about deployments on the App Service docs. My personal favorite is the Azure App Service extension for VSCode, and the instructions for using it are in their GitHub ReadMe.
One thing to note - you cannot assign a custom domain to a Free Tier app service, you will need to use a higher tier, such as the B1 tier. At the time of writing in the US this is about US$13 a month, so don’t forget to delete this resource after the hackathon if you don’t want to keep being billed! It’s also free for the first 30 days, so you won’t need to pay anything during the weekend.
If you’ve already configured your App Service using the free tier, don’t worry - you can scale it up from the Azure Portal. All the instructions are in the App Service docs.
Configure your domain to point to your app
Once your app is deployed you need to point your new domain at it. This is a two step process - you need to tell Domain.com that you want to point your domain to your App Service, and then tell your App Service to handle requests at that domain.
Configuring Domain.com
The first thing to do is to get the IP address of your App Service. You can do this from the Azure Portal or the command line.
From the portal:
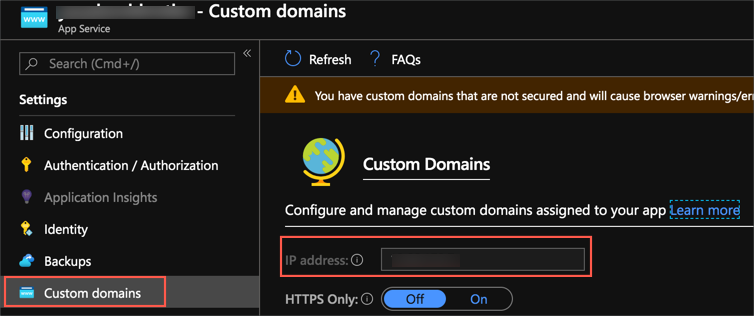
- Log into the Azure Portal, and find your App Service resource.
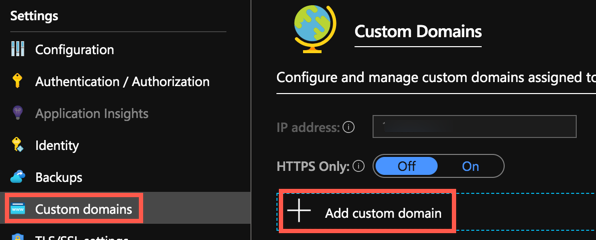
- Select the Custom domains menu item. From here, copy the IP address.
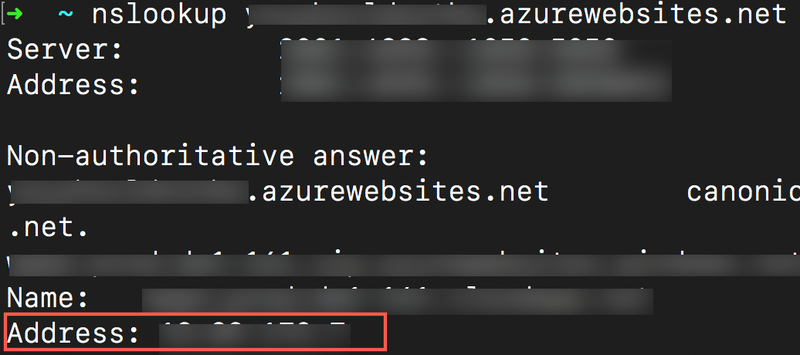
From the command line:
nslookup <your-app-service>.azurewebsites.net
Substitute <your-app-service> with the name of your App Service.
Next you need to configure domain.com to point to this IP address.
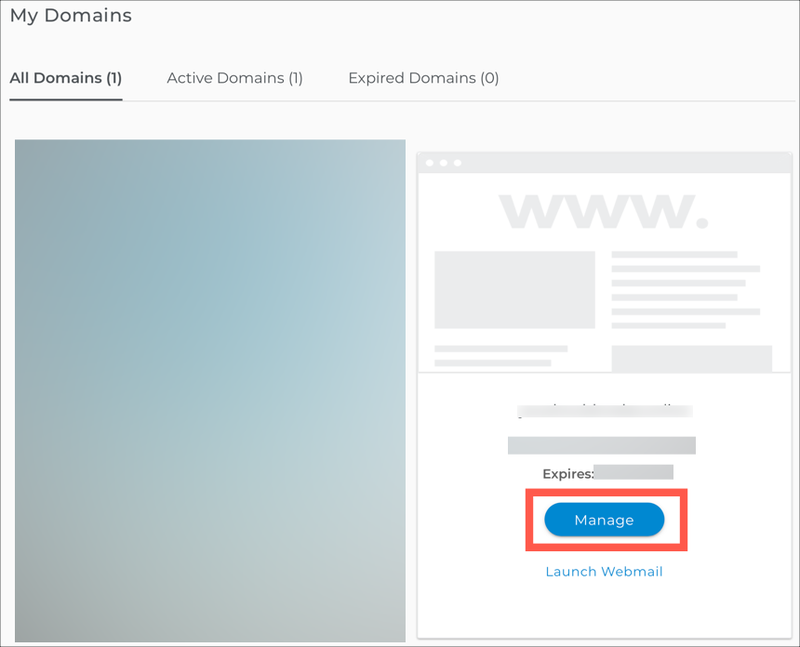
- Log in to Domain.com and select the Domains tab. Then click the Manage button for the domain you want to manage.
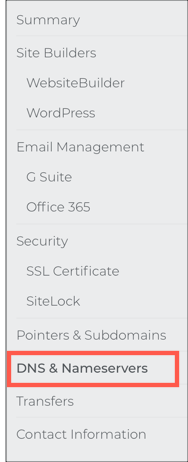
- Select the DNS and Nameservers option from the menu on the left
- Under the DNS Records section there will be a number of records. One will have a Record of A, a Name of @ and the Content set to an IP address. Click the three downwards ellipses at the end of the row and select Edit.

- Set the IP address to be the IP address you copied from the Azure portal, then select Update DNS.
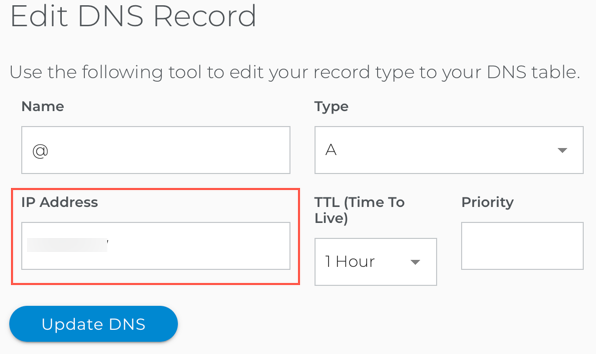
- Look for a TXT record with a name of @. Edit this record and update the Content to be the URL of your App Service which will be
<your-app-name>.azurewebsites.net.

Configuring App Service
Once Domain.com has been configured, you need to tell your App Service to use it. This can be done from the Azure Portal, or the cli.
From the Azure Portal
- Select the Custom domains tab
- Select + Add custom domain
- In the blade that pops up, enter your domain name that you registered with Domain.com. Then select Validate. This will validate that the records are set up correctly and the hostname is available. If everything is valid you will see two green ticks at the bottom.
In theory the DNS record updates can take up to 48 hours to propagate, but in my experience it happens in a few minutes. If the validation fails then wait a minute and try again.
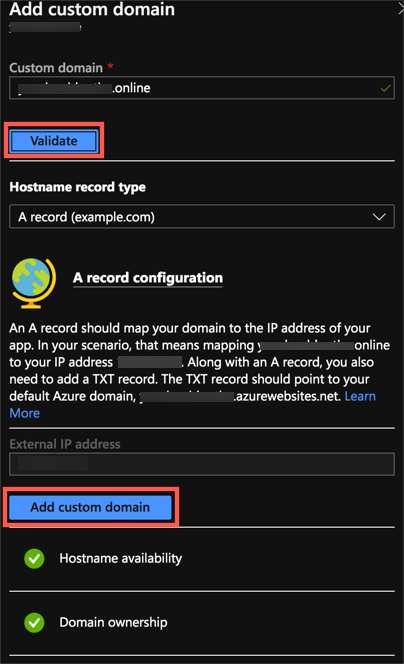
- Once everything has been validated, select Add custom domain.
From the Azure CLI
- Make sure you have the Azure CLI installed. If not, follow the installation instructions. Otherwise use the online cloud shell at shell.azure.com.
- Enter the following command:
az webapp config hostname add --webapp-name <your-app-servce> --resource-group <your-resource-group> --hostname <domain-name>
Substitute <your-app-servce> with your app service name, <your-resource-group> with the name of the resource group your app service lives in, and <domain-name> with the domain name from Domain.com.
If you see any errors, wait a few minutes are try again as the DNS records may not have propagated.
Done!
That’s it - everything should now work. Head to http://<your-new-domain>.<tech/online/site> and you should see the app you deployed to App Service.
You may see a 404 or 403 error to start with - this is because DNS records are cached for a while to save lookups, and your browser is using an old record. To fix this you can either try a new browser or browser window (this sometimes works), or flush your DNS cache.
- On Windows launch a command prompt and run:
ipconfig /flushdns
- On macOS launch the Terminal and run:
sudo killall -HUP mDNSResponder;
Enter your password when asked.
- On Linux this depends on which distro you are using, so it would be easier to search for the relevant instructions using Bing.
Good luck with your hackathon, and I hope you win!