I’m supporting an IoT hackathon over the weekend of April 27th/28th 2019. It will be a cool event, where you can win six months free business support from SETsquared – the world’s leading university business incubator. If you are interested, sign up here:
eventbrite.com/e/the-big-iothack-tickets-58111865153
As a part of this hackathon, PyCom are providing a load of devices. These are tiny IoT development boards that run MicroPython, and can connect over WiFi, BLE, LoRa or SigFox. PyCom have a service called PyBytes that can take data from the devices, and this can be integrated into Azure IoT Hub. To prepare for this event, I grabbed a board and started to play.
You will need an Azure subscription to work thorough this. If you don’t have one, you can sign up for free at azure.microsoft.com/free. This will give you $200 of credit, access to free services for 12 months, and other services free forever. You will need a credit card, but this is only for validation - you will NOT be billed unless to choose to upgrade your subscription.
Getting started
Unpack the board
We were given a big box of kit to try out before the hackathon. It had a range of boards and shields inside.

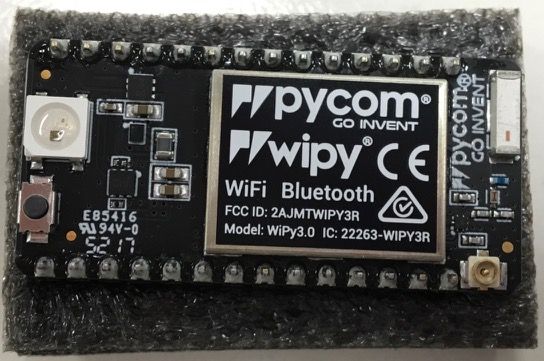
I grabbed a WiPy and a Pysense board.
The WiPy is a WiFi and BLE enabled board running an ESP32 micro controller. It doesn’t have any sensors or USB connectivity, it needs to be added to an expansion board.
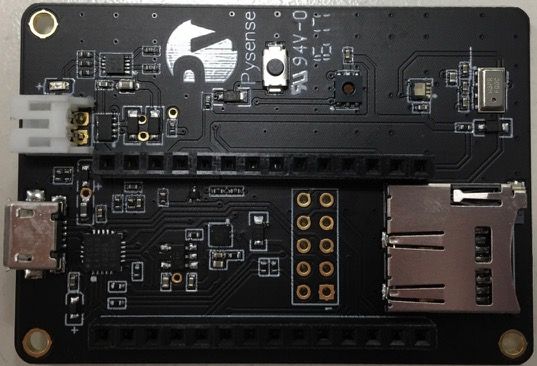
The PySense is an expansion board that the WiPy plugs into. It has a load of sensors as well as a USB port you can use to program the micro controller.
Plug it in
The boards fit together, with the WiPy plugging into the socket on the Pysense. It took a bit of research to determine which way round to plug it in. Next I connected a WiFi antenna. Once it was all plugged together I connected the USB port to my Mac and an LED started flashing! Everyone loves blinking LEDs.
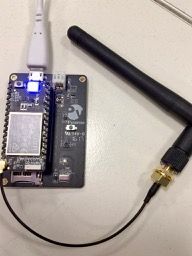
I then did the usual dance to upgrade the firmware by following the PyCom docs. As a heads up, if you are using a Mac, unplug everything from the USB ports first otherwise you’ll get errors as it tried to push the firmware to the wrong device!
Configure the software
Like a lot of developers, I love Visual Studio Code! PyCom provides an extension for Code that can talk to their boards.
Write some code!
These boards run MicroPython, an implementation of Python designed to run on micro controllers. MicroPython projects have the following structure:
Project folder
|-lib
|  |- some_library.py
|- boot.py
|- main.py
Inside the project folder, there is an optional lib folder and two .py files. boot.py is optional and contains any code that you want run when the board boots up, such as connecting to WiFi. You can think of this as the same as the setup function in an Arduino C project. main.py is not optional, and contains the main code that will run on the device, analogous to the loop function in Arduino. It isn’t a loop as such, it won’t be called continuously, instead you will need to add your own processing loop. The lib folder is where you can put other .py files. This is the only directory that MicroPython will look in, you can’t put files in other directories or sub-directories of lib.
I created a new folder, and added main.py file. The code for this file is:
import pycom
import time

pycom.heartbeat(False)      # Turn off the heartbeat

while True:
    pycom.rgbled(0xFF0000)  # Red
    time.sleep(1)           # Sleep for 1 second
    pycom.rgbled(0x00FF00)  # Green
    time.sleep(1)           # Sleep for 1 second
    pycom.rgbled(0x0000FF)  # Blue
    time.sleep(1)           # Sleep for 1 second
This code imports the pycom module containing code to interact with the board, and a time module to provide access to code to sleep.
The code starts by turning off the heartbeat - this is a regular pulse of the on-board LED that shows you the board is powered on.
Next it runs a loop - using a while True: loop to always run the code. The suite inside this loop sets the LED to red, sleeps for a second, then green, sleep, then blue, sleep.
Python is different to a lot of other languages in that
sleeptakes a time in seconds, not milliseconds.
To deploy the code, launch the command palette and select Pymakr->Run current file. This will compile the code and run it to the device. Once done, the LED will start to flash red, then green, then blue.

This only runs the code on the device, it doesn’t store it permanently, so once the device is rebooted, the code is wiped. To upload the code so that it is maintained between reboots, use Pymakr -> Upload project.
Send data to the cloud using PyBytes
Getting an LED flashing is cool, but what is cooler is getting data and sending it to the cloud. PyCom has a service called PyBytes that takes in data from PyCom devices.
Connect to PyBytes
PyBytes makes it easy to configure your device. You add a new device from their Web dashboard, set up a unique name for it and the WiFi details for the WiFi you want the PyCom device to connect to. You then get an activation token that you can use when flashing the firmware to push these details to the device.
Flash the firmware, and configure it for PyBytes, setting the activation token.
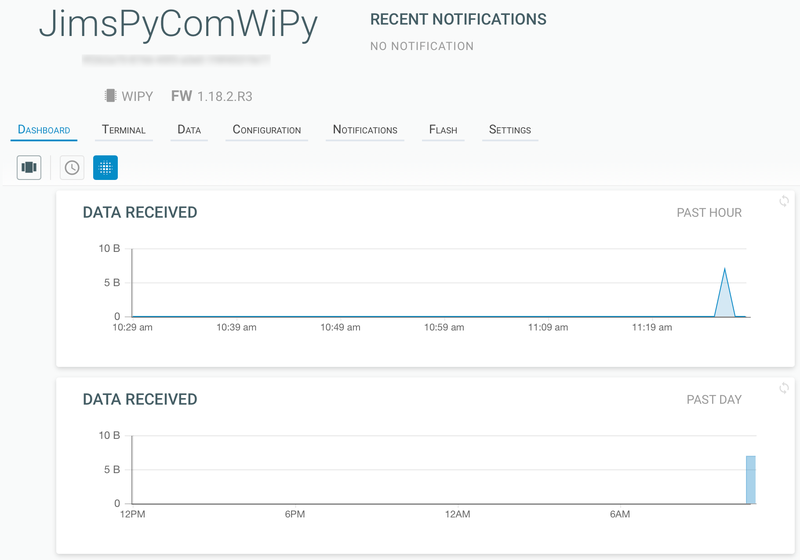
Once the firmware is updated, the device will appear in the PyBytes dashboard.
Set up the dashboard to receive some data
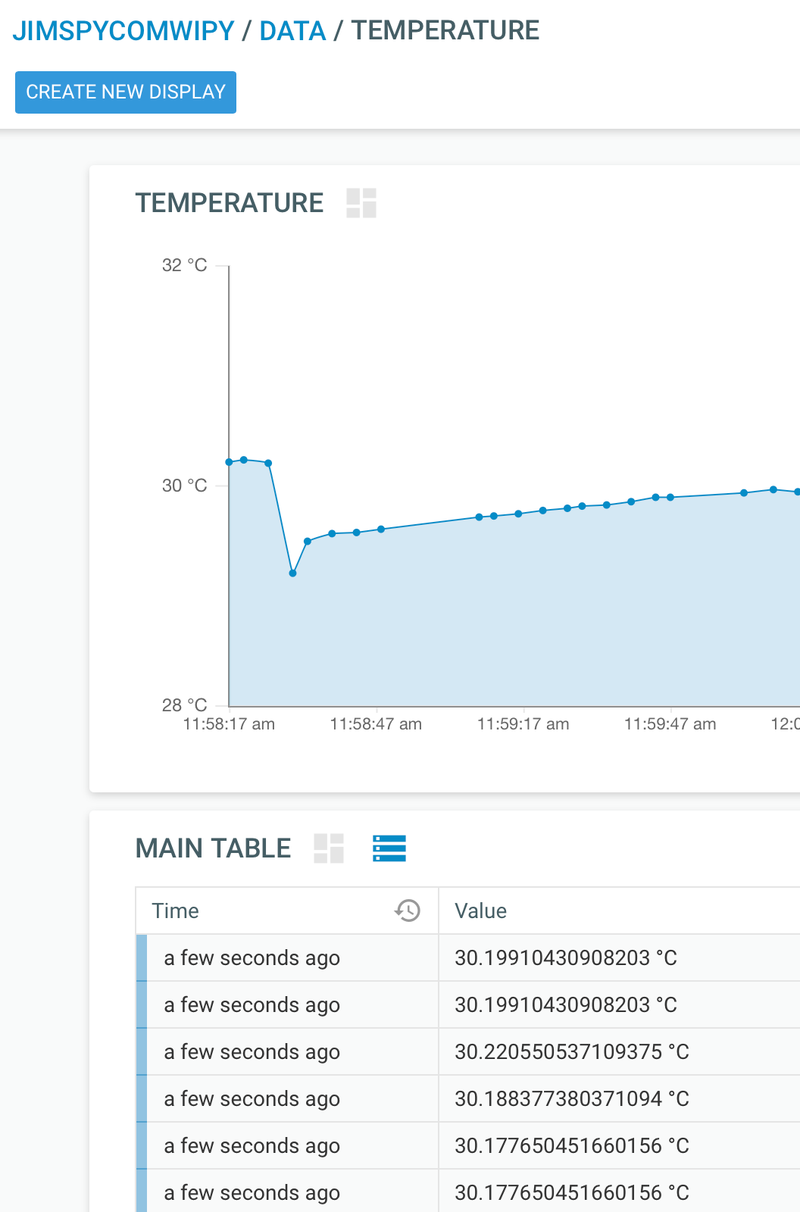
PyBytes manages data as signals. A signal is data sent from the device, identified by a unique number. The PyBytes dashboard takes the signal data, enriches it with a name and unit and allows it to be displayed on a dashboard.
From the Data tab on the dashboard, I defined a new signal called Temperature for ID 0, with the unit set to °C.

Send some data
Once the signal was created, I needed to send data to it from the PySense temperature sensor. There are libraries for accessing the PyBytes API, and the PySense board, and these need to be grabbed from the PyCom GitHub repo and dropped in the lib folder. I grabbed the [pysense.py](https://github.com/pycom/pycom-libraries/blob/master/pybytes/pysense/lib/pysense.py) and [pycoproc.py](https://github.com/pycom/pycom-libraries/blob/master/pybytes/pysense/lib/pycoproc.py) libraries to talk to the PySense board, and the [SI7006A20.py](https://github.com/pycom/pycom-libraries/blob/master/pybytes/pysense/lib/SI7006A20.py) library to access the temperature sensor.
The code I used to send the data is:
import pycom
import _thread
from pysense import Pysense
from SI7006A20 import SI7006A20
from time import sleep

pycom.heartbeat(False)

py = Pysense()         # Connect to the PySense board
si = SI7006A20(py)     # Connect to the temperature sensor

while True:
    pycom.rgbled(0x0000FF)         # Flash the LED blue
    temp = si.temperature()        # Get the temperature
    pybytes.send_signal(0, temp)   # Send the temperature using signal 0
    pycom.rgbled(0x000000)         # Turn off the LED
    sleep(5)                       # Sleep for 5 seconds
This uses the SI7006A20 temperature sensor to get the temperature, then sends a signal to PyBytes, using a signal id of 0. This data then appears on the PyBytes dashboard.
Integrate PyBytes with IoT Hub
PyBytes supports integrations with Azure IoT Hub, and it can push the data received from the device into IoT Hub.
Create an IoT Hub
I created a new IoT Hub instance to send the data to. I’ve got the Azure IoT Device Workbench extension installed in Visual Studio Code, and this provides capabilities to configure IoT services from inside Code.
From the command palette, selecting Azure IoT Hub -> Create IoT Hub allows you to create a new IoT Hub. Follow the instructions, and you get a new IoT Hub set up.
Integrate the IoT Hub into PyBytes
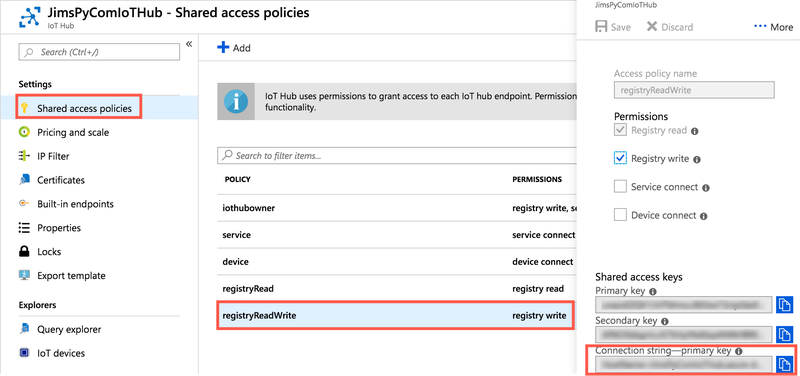
When the IoT Hub is running, open it up in the Azure Portal. Head to Settings -> Shared Access Policies, select the registryReadWrite policy and copy the Connection string - Primary key. PyBytes needs read and write permissions on the registry to register devices for you - each device configured in PyBytes becomes a device in IoT Hub.
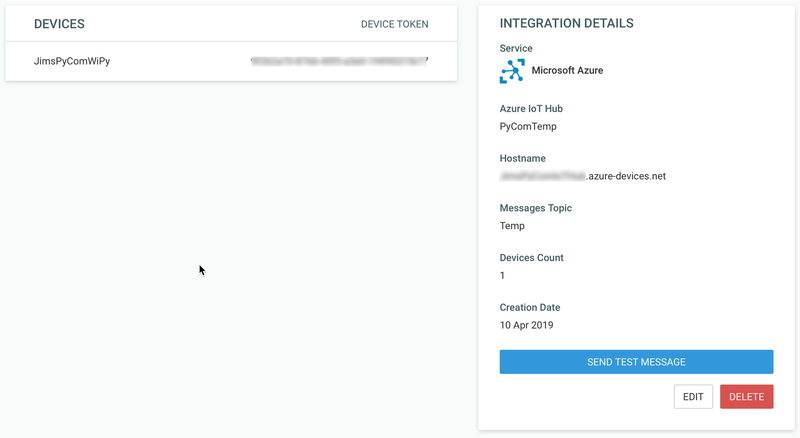
From PyBytes, select Integrations -> New Integration. Select Microsoft Azure, then paste the connection string and select Login. Give the integration a name, enter a topic for the messages and select the devices you want to include. Then select Create. Once the integration is created, you can send a test message, then check for this in the IoT Hub.
You will also be able to see the device in the devices list both in the IoT Hub list, and in the Azure IoT Hub Devices section in the explorer. You can right-click on the device in the explorer and select Start monitoring D2C messages… to see a stream of the messages in the output window.
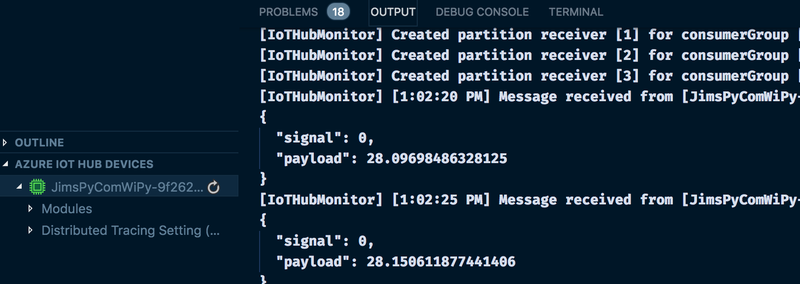
The data is raw, unenriched data showing the signal id and value.
Next steps
Now that the data is flowing into IoT Hub, you can do anything you want with it - enrich it using stream analytics or an Azure function, do time series insights on it, anything you want!
All the code for this project is available on GitHub here: github.com/jimbobbennett/PyCom-AzureIoTHub